The minimum order we print is 1m. This is ideal for smaller projects, sampling and strike-offs*.
There is no maximum order. For orders over 200m please contact us for print process and lead times required.
*When ordering over 10m of any new design we will always recommend ordering a strike-off first. A 1m strike-off allows you to see how the colours and your design will print on the fabric of your choice.
We will print your designs as soon as possible after receiving your files. Lead times can vary throughout the year so please allow plenty of time to meet your deadlines. If images are not sent in the right format or files are corrupted for any reason this will delay printing.
Please refer to our pricelist to work out costing. Once the fabric is ready we will phone you for your payment by credit/debit card. We will then post your work by courier (bags £9.75, rolls start at £19.50, scarf boxes £19.50).
International client orders. We will raise a proforma for your order and ask for payment prior to commencing the printing. Courier rates will vary according to the speed of delivery and the weight of the parcel.
NB: Velvets and other heavy gsm fabrics may need to be delivered on a roll due to the nature of their construction.
Generally, please allow 7–10 working days from placing and paying for your order to delivery. Lead times do vary throughout the year so it’s always best to check with us.
Are you in a hurry to get your printing back?
There are some things you can do to help speed things up. Avoid any unnecessary delays by following our suggestions when it comes to digital textile printing.
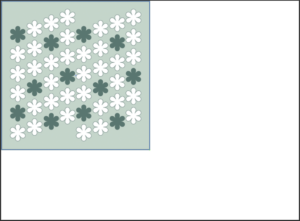
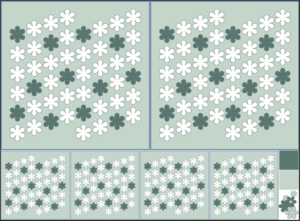
By creating a multi-coloured, multi-patterned design you are truly going to get the best out of digital textile printing. We print using 8 different colours to achieve a wide spectrum of colour values. Why not use them?
Does your design fit into the printable width of the fabric you have chosen? If it’s too wide some of your artwork will be cut off. Please check on our website to find out the printable width of your chosen fabric.
Is the design to the right scale? Too big or too small? It needs to be just right.
Remember, we only print the artwork you send to us.
Decide in advance which fabric is best for your project.
With over 100 print-ready fabrics in stock there is plenty to choose from. With so many different compositions, widths, weights and base colours make sure the one you choose is appropriate for the final outcome of your project. Cushions, garments, everyday wear, evening wear? There is a different fabric for every scenario. To help you to decide, we offer pre-printed samples. These will give you a better idea of how different colours and patterns show in print.
Available for just £9 (inc. VAT) and free postage (UK only). Simply choose your 10 swatches and email info@silkbureau.co.uk We will create your swatch collection and post it back to you.
With a clear focus on the fabric you need for your latest project you now have the option of ordering just 5 pre-printed swatches. For only £6 (inc. VAT) we can prepare and post (UK only) your R&D* pack.
*research and development
Have you saved your files correctly?
Please ensure that all your digital files are saved in the correct format and to our printing specifications:
JPEG- or TIFF-formatted file with the following specifications: 180-300dpi; RGB(Adobe 1998); flattened; maximum 5m, embedded colour profile
If the files aren’t saved correctly you may have issues trying to upload your order. We have put restrictions on our file transfer facility to help ensure that files are securely received. It all helps to ensure that the artwork is printed correctly. We aim for crisp images and smart colour reproduction. Not saving a file correctly may result in shifts in the layers, poor colour reproduction, ‘soft’ or blurred artwork etc, all causing generally unsatisfactory results.
Get your order straight into our processing system.
Carefully check your files. Zoom in to review your artwork at 100% scale, as this is the size at which your artwork will be printed. If you’re happy that the files are saved correctly and looking just how you would like them to, then use our file transfer facility to submit your order. This will accept files that are up to 200MB in size. If you can’t get your file memory size to less than that, then you may experience issues with your Internet upload connection speed. The first thing to do is to have a look at reducing the file size. Our ‘Checklist – Optimise your files’ section may help (see step 7 below).
You can be assured that all the orders submitted through our website reach us correctly. You will receive a confirmation email detailing the order you have placed. This process will download your files directly into our processing system and will be actioned as quickly as possible. No need for separate order forms, waiting for our team to download and prepare your file or order – we’ve got everything we need, with the click of the submit button, to get on with it. And don’t worry, we will contact you should we have any queries regarding your order.
 Sample before production.
We strongly advise that you do sample prints of your artwork (minimum order 1m) before any bulk orders are needed. This step is ideal to test colours and outcomes of your digital files on the fabrics of your choice. Once you have approved the outcome, larger orders can be placed with confidence.
If you have tried a different printing company before coming to The Silk Bureau, please be aware that our printing will look different. Do not rely on tests printed elsewhere.
We will always do our best to meet your request.
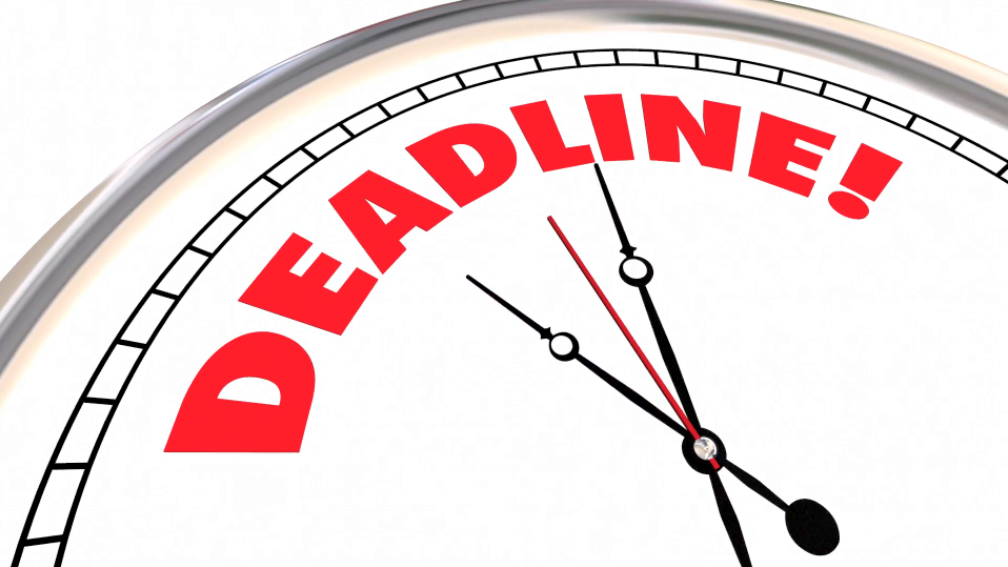 If you have a specific deadline for your order, then please make sure you give us plenty of time to process it.
Are you aware of all the steps digital printing has to go through? Our ‘How it Works’ page has short video clips that fully explain the processes involved. If only it were as easy as pushing a button, you could have it all the next day, but sadly it’s not that simple. Our complex, fabric-dependent print process takes a number of days to complete. At any stage, something could go wrong. And, if our Quality Control department doesn’t approve the final prints, we have to start all over again. This is essential to provide the high standards you expect.
The ‘Comments’ box on the upload order page of our website is also handy for you to add any notes or instructions too. This includes your deadline. We do our utmost to meet the dates noted at the time of ordering but unfortunately it’s not always possible.
If you would like a copy of our price list, please contact info@silkbureau.co.uk or call 01386 861122 and we will send you our latest version.
CREATE YOUR OWN PRE-PRINTED FABRIC SWATCH SAMPLE SET
With so many fabrics to choose from, why not get a clear idea of which ones are best for your project by ordering some of our pre-printed sample swatches?
Each sample is pre-printed with our colourful mood board and measures 14x21cm (A5).
These swatch collections make an ideal resource for choosing the perfect fabric when planning your next project.
Available for just £9 (inc. VAT) and free postage (UK only). Simply choose your 10 swatches and email info@silkbureau.co.uk We will create your swatch collection and post it back to you.
Is 10 too many?
With a clear focus on the fabric you need for your latest project you now have the option of ordering just 5 pre-printed swatches. For only £6 (inc. VAT) we can prepare and post (UK only) your pack.
On receipt, please examine the fabrics carefully before proceeding with any cutting or usage. Direct or indirect claims for any reason whatsoever will not be accepted once the customer, or any party acting upon their instructions, has cut or processed the fabric in any way.
Claims for any alleged defects, or shortages must be made in writing within seven days of delivery of the fabric.
You have just created a wonderful design that you would like to print on one of our fabulous fabrics.
So what do you do next?
To start, please check that your artwork is saved correctly.
Resolution: 180-300dpi
Colour Mode: RGB Colour, 8 bit. (You may have created your design in CMYK Colour Mode but this will need to be changed to RGB. A slight colour shift may occur)
Advanced-Colour Profile: Adobe RGB (1998) (we recommend this as it brings out the best colours in the printing) or sRGB.
Flatten your artwork. It is really important that your file does not have any layers in it. When transferring your files over the internet they are vulnerable to corruption.
Save as: TIFF or JPEG. We can only accept these file formats for our specialist software.
When naming your file please do not include any unusual characters such as @ or !
Check the physical and memory size of the file.
Look at the Document size. This is the best guide to see how big your print will be. This can also be checked when you upload through our website as the file size will be displayed. You may also see a canvas with the file placed in the top left-hand corner. The rulers on the top and down the side show in centimetres how much space your artwork will take up on the fabric.
Also check how large the digital file is. If it is over 80Mb you will not see the canvas. Keeping your files below this will also ensure that they arrive quickly and safely to our CAD team. Don’t worry if it’s over – it’ll just take longer to upload and for us to download. But nothing too big, please, or you will get error messages – contact us if you do experience this.
When your artwork is ready to be sent simply go to our Order page and follow the step by step instructions.
Choose your fabric
How much would you like printed (minimum 1m or 100cm)?
Upload your artwork – check the size
Is it a repeat pattern? If you choose ‘yes’ you can see the design repeat in the fabric window.
Add any other images and choose their fabrics all in the one order.
Complete the rest of the order form with your details.
Click > Send Order.
You will receive a confirmation email that your order has been received successfully. If there are any problems, someone in our CAD team will be in touch to advise.
If this is the first time you have placed an order you will be contacted with the full invoice so you will know how much it’s going to be before we print it.
We recommend using Adobe Photoshop when designing and creating your files for print, and so the following guides refer to this software.
1. Launch Adobe Photoshop and create a new document set to the width of your fabric and the height to the metreage you would like.
In the New window set ‘width’ to the width of the fabric you have chosen. In this case we are using Satin, so the width is 136cm (see Fabrics page for details).
Set the ‘height’ to a minimum of 100cm. This is the minimum print run we offer. If you need more metres, simply increase this height to your desired length. We do, however, prefer a file to be no longer than 500cm (5m).
Set the Resolution to 180dpi (or to match the original files that you will be adding) and the Colour Mode to RGB 8 bit. Keep your selected colour profile. We recommend using Adobe RGB (1998) however sRGB is just fine.
2. Place your completed image onto the page you have just created.
Move it to the top of the canvas and continue to place files until you have filled it.
Tip: try not to leave any space on the canvas. Find something else you could add or include some test images you might like to try.
3. When you’re happy with the layout you’ve created, it is important to flatten your image.
4. You’re now ready for the final save.
Choose TIFF or JPEG as the file format, and embed your colour profile by checking the box.
Please do not include any special characters in the title of your files, such as @. These symbols cause issues when trying to download your files.
Your file is now ready to send to us for printing. Open our Order page and follow the steps.
If you are having problems uploading your artwork please go through the following checks:
Is your file saved in the correct format?
JPEG or TIFF
Is your file saved in the colour mode?
RGB
Is your file between the recommended resolution?
180-300 dpi
Have you embedded your colour profile?
Adobe RGB (1998) or sRGB
Have you flattened your artwork?
No layers
Is your file too large?
Any file over 200MB may struggle to upload and either timeout or freeze. Please try to reduce your file size.
If you have made all these checks and are still having problems uploading your file, contact us on 01386 861122 for advice.
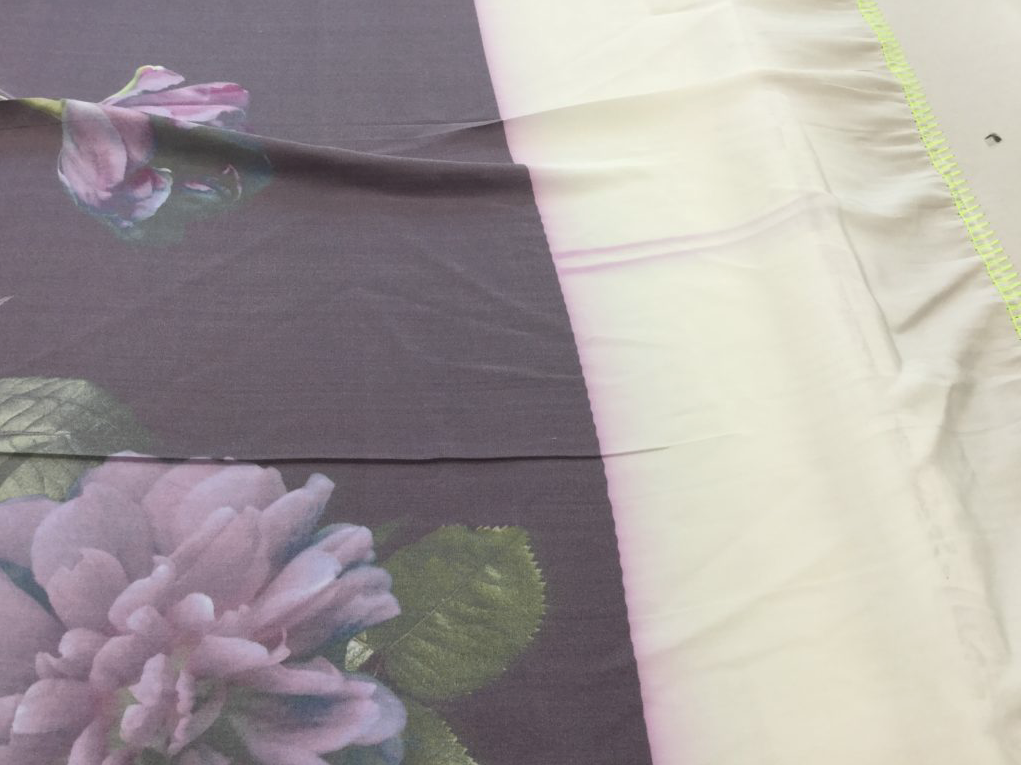
It is important to allow for shrinkage. Shrinkage can be up to 10% on most fabrics, however for stretch fabrics it can be up to 20%. Short runs shrink more than longer runs pro rata; however, this is not a precise science. Shrinkage can vary from one batch of fabric to another.
Your digital print file will not be the same size as your final fabric. The post printing process will cause shrinkage.
It is not a good idea to design for specific placements of pattern or pattern pieces within your files. The degree of shrinkage is not exact.
Because of the high risk involved with panel and placement prints, there may be an additional charge of £1 per metre depending on your artwork. Please contact us if a placement or panel piece is important in your design.
 We do not colour match. Please be aware that we can only print the detail our system reads on your JPEG/TIFF files.
We have a very sophisticated colour calibration system which picks up virtually all colours on the spectrum. Occasionally there are colours that we cannot reproduce from the colour gamut of the dyes we print with.
The colours that you see on your monitor may not be the same as we see on ours, as everyone has their monitor set slightly differently.
There may be some colour variation between batches of printing due to the natural characteristics of the materials used.
The Silk Bureau will endeavour to ensure there is minimal colour variation between batches of printing, however there are circumstances beyond our control that may cause differences when reordering.
The Silk Bureau strives to keep technical equipment as current as possible in order to provide the best printing quality in the digital textile sector. This requires us to embrace software and machinery development. It may happen that due to the evolving nature of technology, changes in the colour hues over time are inevitable and unavoidable. We cannot be held responsible for amendments or changes introduced by third party suppliers of dyes, chemistry or technology that are imposed on us and are, therefore, out of our control. Please be advised that this may affect any repeat print requests over a period of time.
The Silk Bureau does not offer colour matching as a service. It is advisable to carry out testing before placing a large order in order to have a more accurate indication of how the final print will look.
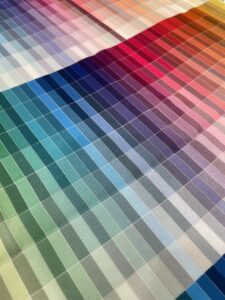
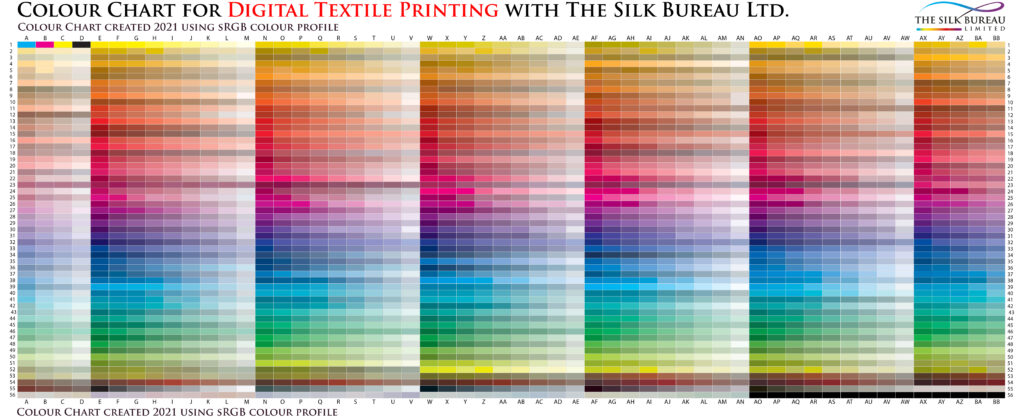
For a better idea of how colours print why not order one of our colour charts?*
This full-width, 135cm x 50cm colour chart is packed with a range of colours, printed on luxurious 100% silk*, and a physical reference source to help you make informed decisions on the colours you choose in your artwork. The fabric chart also includes a digital JPEG file of our colour chart. Just drop us an email to get yours.
*The cost will vary according to the fabric you have selected. With a minimum fabric order of 1m, why not use the additional 50cm for design sampling or simply add to your current order?
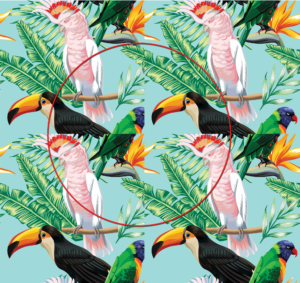
Digital fabric printing is best suited to multi-coloured, multi-patterned designs. Leaving large amounts of white space or block colour in your images greatly increases the risk of marks being apparent in these areas. There is both a risk of ink spots during printing, or ‘mark back’ onto any large flat areas of colour during the processing stage.
Additionally, large areas of graduated colour, including areas of close contrast, may not be fully reproduced by our printers. However, any merging ombre and close contrasted colours will be printed onto the fabric as best as technically possible and within the achievable colour gamut of our specialist software.
If you still wish to proceed with printing these files, it will be at your own risk and we will require confirmation of your understanding that we will be unable to offer any reprints should any of the above issues occur.
Due to the delicate weave of many fabrics we do not recommend designing geometric shapes or straight lines that may be printed on the weft as they may easily distort.
Please feel free to contact us if you require further clarification.
 Bad repeat
 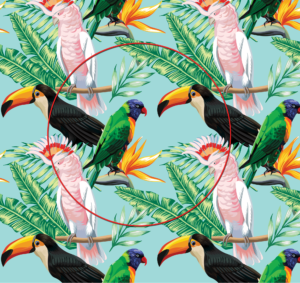 Good repeat
If you would like your design (tile) repeated across the entire width and height of the fabric then please check that it repeats correctly, without obvious join lines.
You can check this in Adobe Photoshop by using the Pattern Fill Tool.
1. Select the entire tile you have designed. Make sure that the resolution is 180dpi.
Edit > Define pattern.
Name your file > OK
2. Create a new file at least 4 times larger than the repeating tile at the same resolution of 180dpi.
File > New
3. In the new file
Edit > Fill
Select pattern in the Use drop-down list and then select your tile from the options available.
Tip: it should be the last one in those available.
4. Your original design will be repeated within the new file. Zoom in to check there are no gaps or obvious join lines.
Tip: when you are happy that your image repeats correctly just send us the tile not the new test file. We can use that.
Due to the lightfastness ratings of the dyes we use, it is not recommended to order fabrics intended for curtain and blind use. Fading from sunlight is inevitable.
Consider choosing a polyester fabric as an alternative. As they use different dyes and printing methods, the results have more longevity.
Getting the right colour is very important for designers who have spent a great deal of time and effort in producing designs for a particular outcome.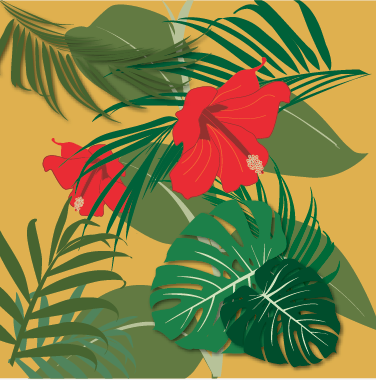
Here is a design that I have been working on. On screen the colours look just how I want them. But how do I know what it will look like when it’s printed?
Will my printing match the colour of the accessories? Will my cushion fabric colour match my throw?
What you see on screen may not print out the same on fabric.
It’s a huge challenge to match colours from different materials but you can get quite close with the right testing.
The best solution is to invest in a sample template, created from your design, and printed in a variety of colour ways on 1m of fabric.
Here’s how to do it.
We are using the designer software package Adobe Photoshop for this guide.
1. Launch Adobe Photoshop and create a new document set to the width of your fabric and to a maximum height of 100cm.
File > New
In the New window set ‘width’ to the width of the fabric you intend to use for your final production, i.e. what you’re going to make with it, such as a dress or cushion. In this case we are using Satin, so the width is 136cm (see Fabrics page for details on the width of your fabric).
Set the ‘height’ to a minimum of 100cm. This is the minimum print run we offer. So cram it full of all the tests you can think of.
Set the Resolution to 180dpi (or to match your original file) and the Colour Mode to RGB 8 bit. Keep your selected colour profile. We recommend using Adobe RGB (1998) but sRGB is fine.
2. Copy and Paste your original design into the New file. Move it to the top corner of your New file.
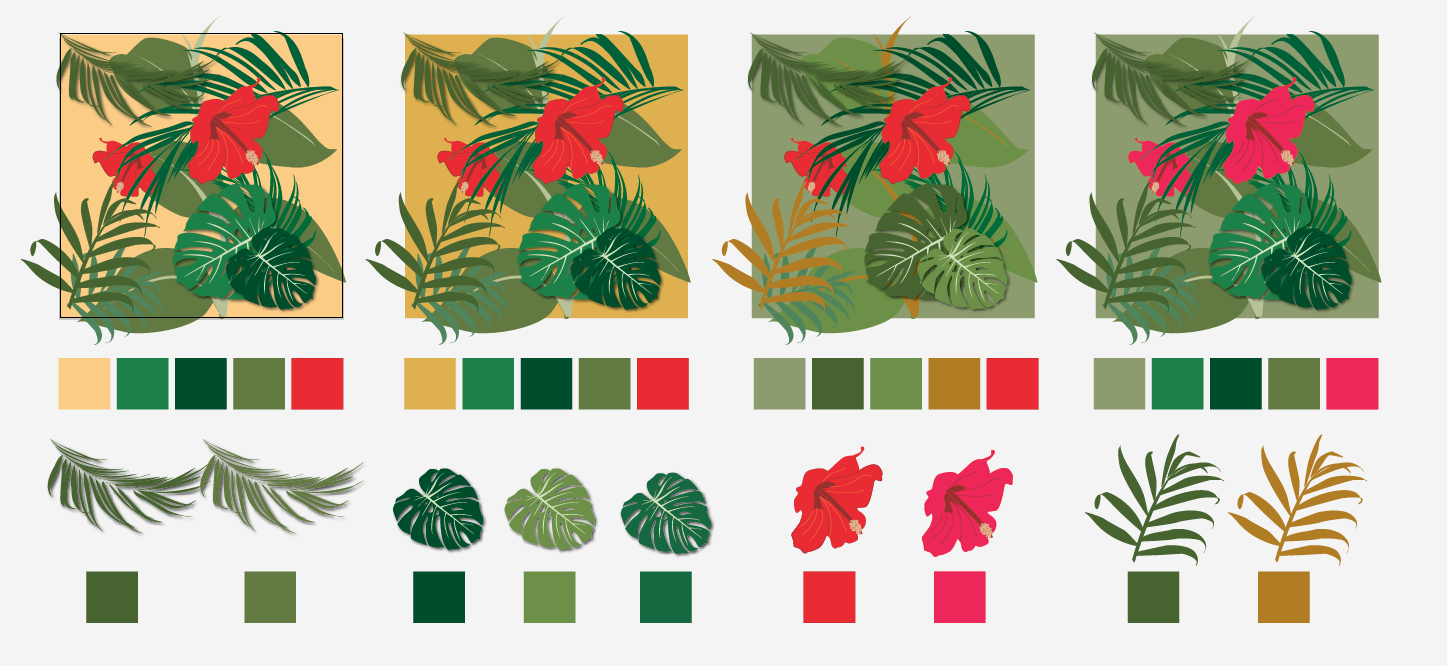
 The design I have selected has a number of colours in it that I might want to vary in the final production. I can now create a variety of colour ways from the whole design and also create colour chips from the dominant colours of green, yellow and red.
3. Repeat the design several times or add details of the design for a closer look.

Select each layer individually and experiment with different colour adjustments and values to give a slightly different finish. See how they look in close proximity to each other.
Colours can react differently depending on the colour they are positioned next to. For example a yellow next to a blue may look a little green where they connect. The same yellow might look more orange if it were placed next to a red. By adding a strip of colour chips under the design you are able to quickly replicate them again for your final production.

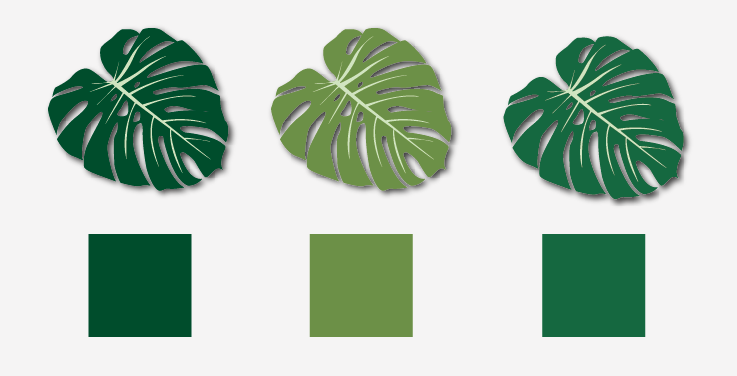
Which green works best for my leaf?
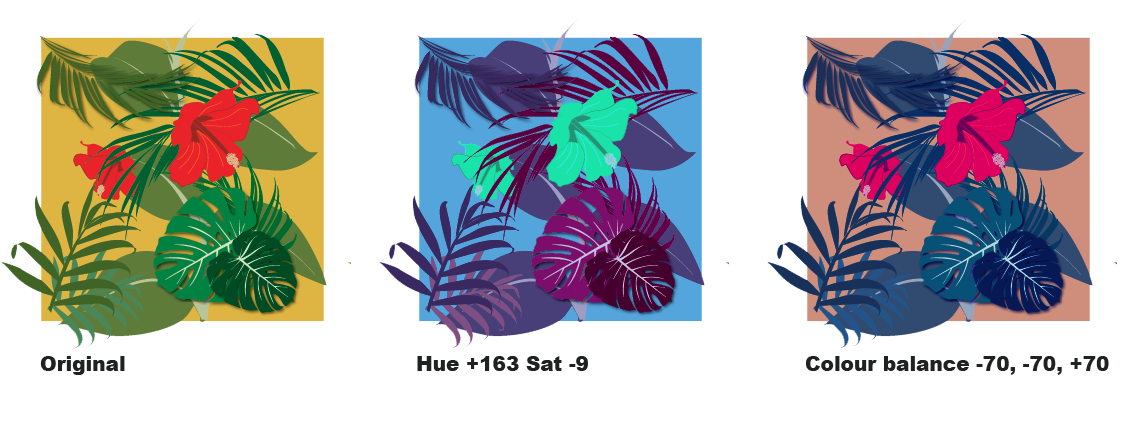
4. Photoshop adjustments.
You may want to experiment with the design using adjustments in Photoshop.
Image > Adjustments
These can be as subtle or as dramatic as you wish. Remember to label each adjustment on the print so that you can replicate it in the final production.
Finally flatten and Save a copy of your file as either a JPEG or TIFF.
Once your fabric is returned to you, you will be able to make an informed decision on the right colour way to choose. Simply apply the same colour choice to your original file and save for production.
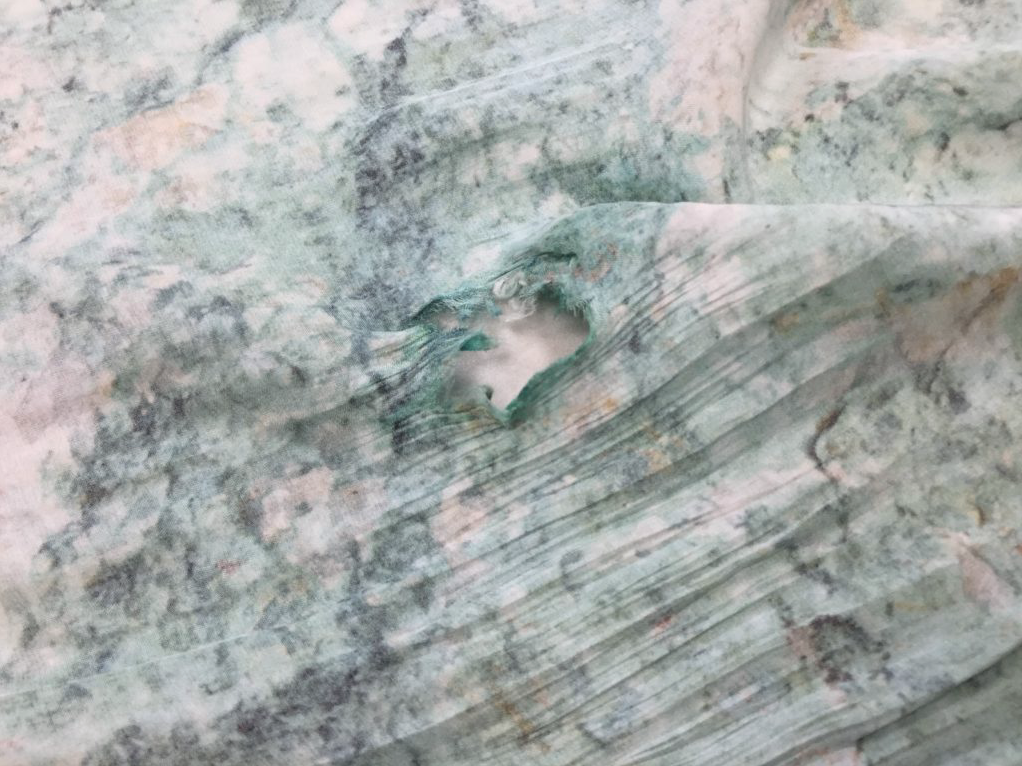
Severe wrap around in washer causing creasing and holes. Will need to be reprinted.
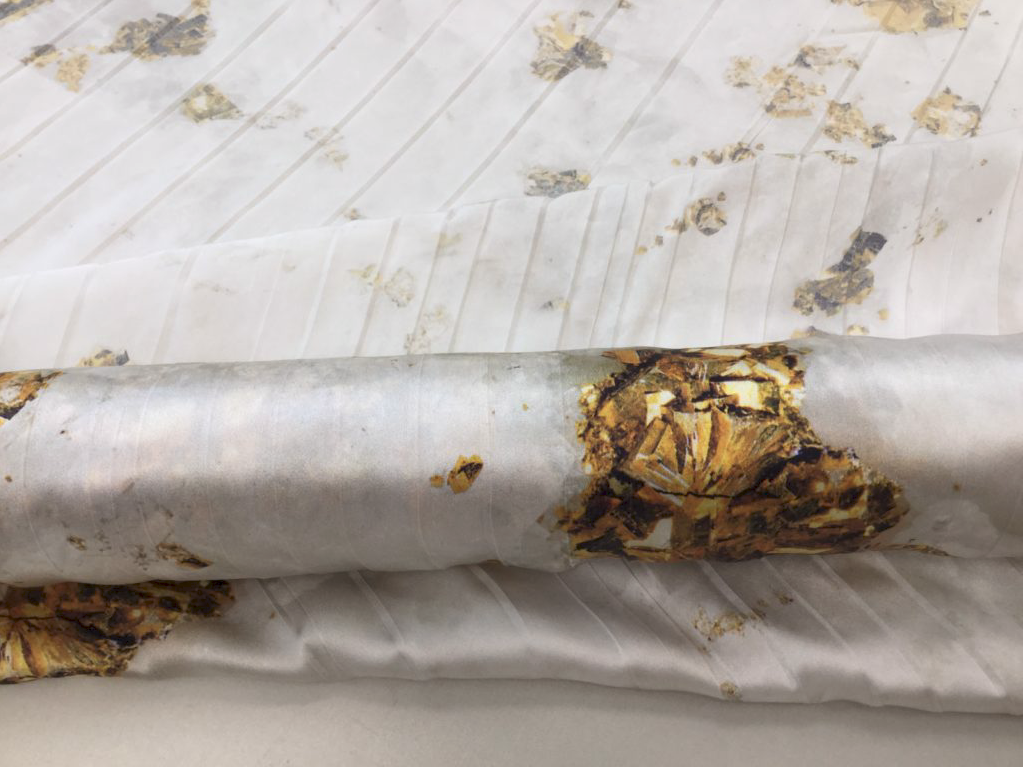
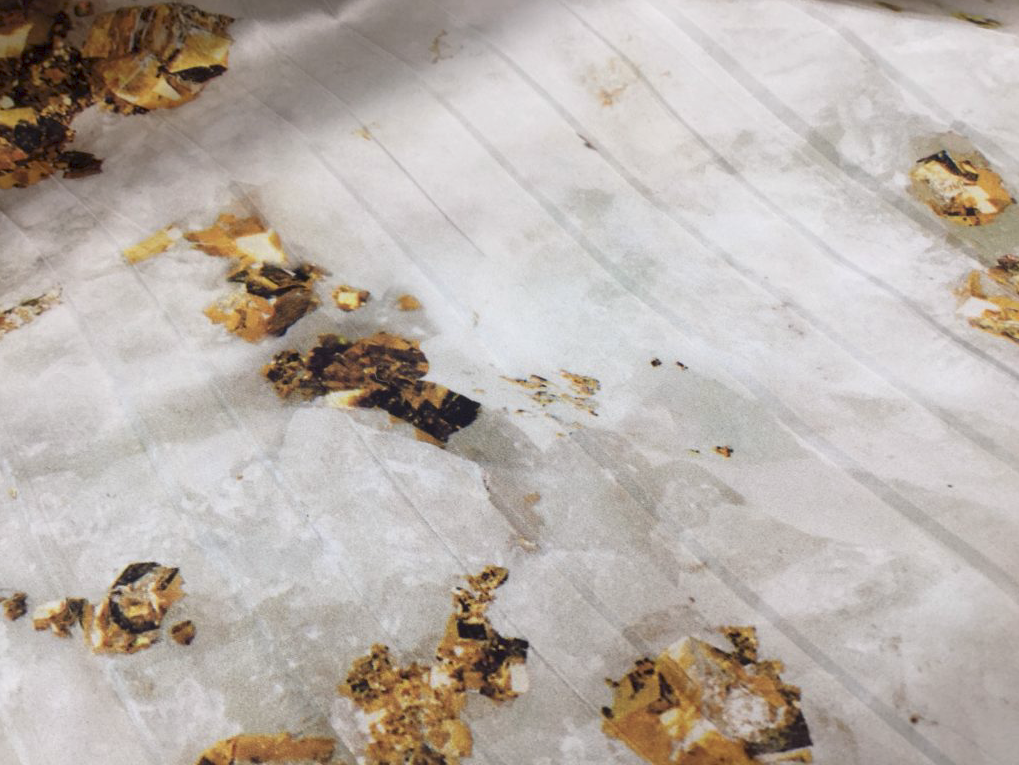 Wrap around causing extreme creasing. Will need to be hand-ironed to resolve.
Washer damage causing bleeding to colour. Reprint required in most cases.
Bruising can occur when force is applied to the weave, distorting the weft and warp from their original directions. The pulling apart of the threads leaves a mark that looks a little like a bruise, hence its name. Take a look at this short video clip where force is deliberately applied to the bias on a wool scarf.
Video – How a bruise can happen
There are occasions when the bruising can be repaired by gently teasing the threads back into position, as this video shows.
Video – Repairing a bruise
This is quite common in lightweight, open weave fabrics. By nature, they are more delicate and more susceptible to damage. It is important to choose your fabric according to its intended use and the care it requires.
Block colours will highlight a bruise, whereas multi-coloured, multi-patterned designs disguise bruises that may happen over time with use.
If you select fringe hemming, you may need to adjust your artwork to suit this particular finish. Please see this video on fringe hem best practice.
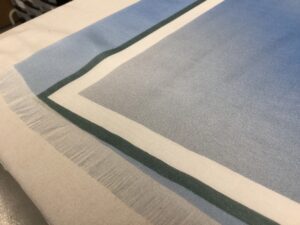
Getting the weave of the fabric exactly square is practically impossible. Having a border around the edge of the scarf will emphasise the skew of the fabric. Borders look great on machine hem finishes, but not fringed ones.
Example is Heavy Crepe de Chine.
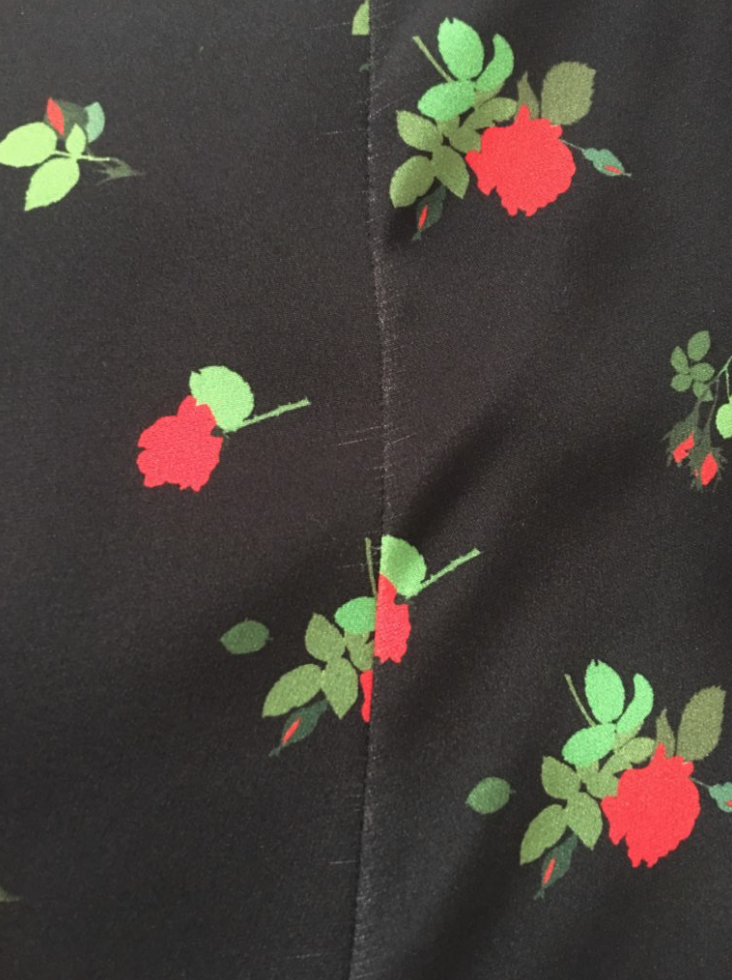
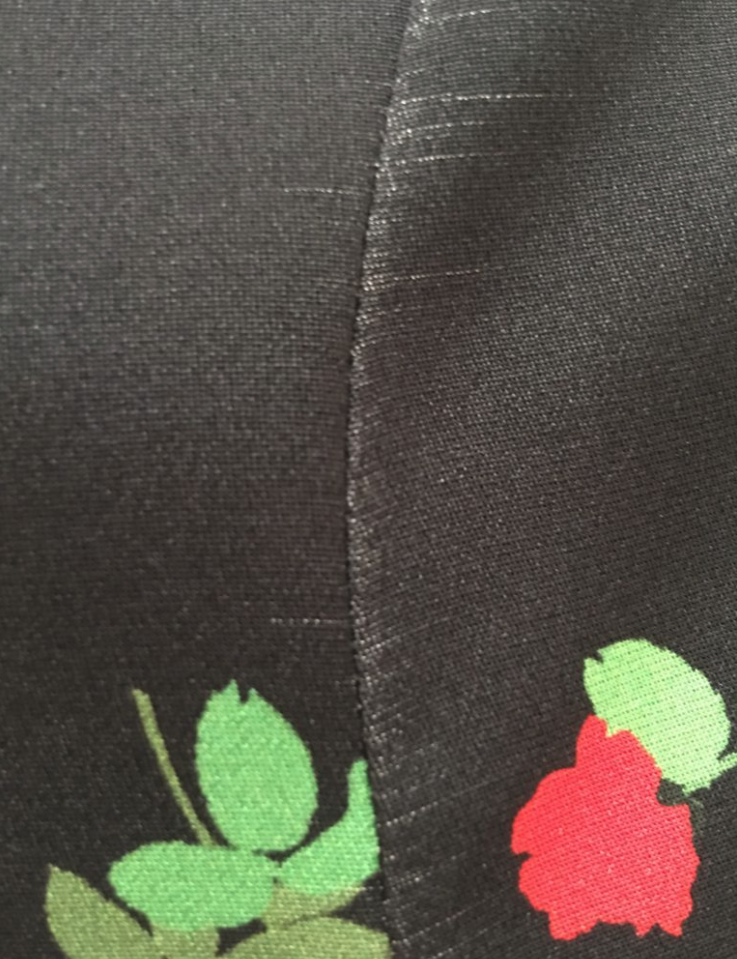
It is important when making your digitally printed fabric into garments that your seamstress uses extra sharp needles. A thread that has been created by twisting fibres together can often be split by the needle causing it to unwind slightly. As the dyes may not have penetrated deep into the weave there may be evidence of the base colour visible.
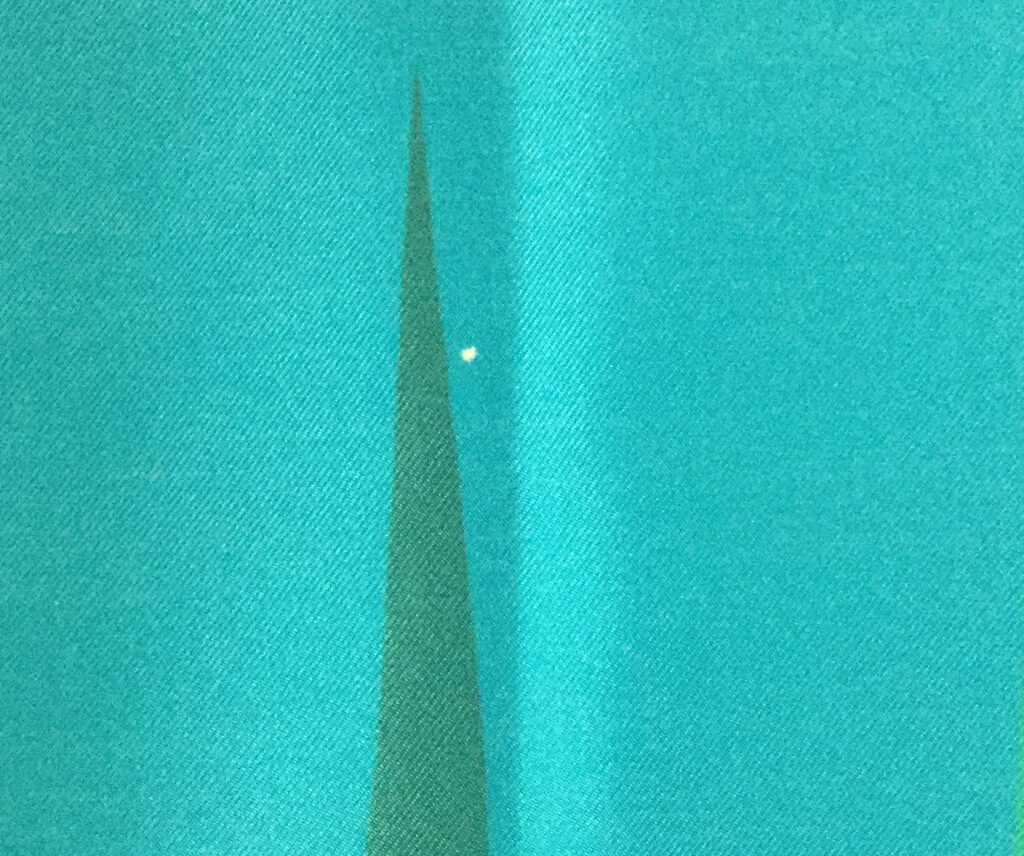
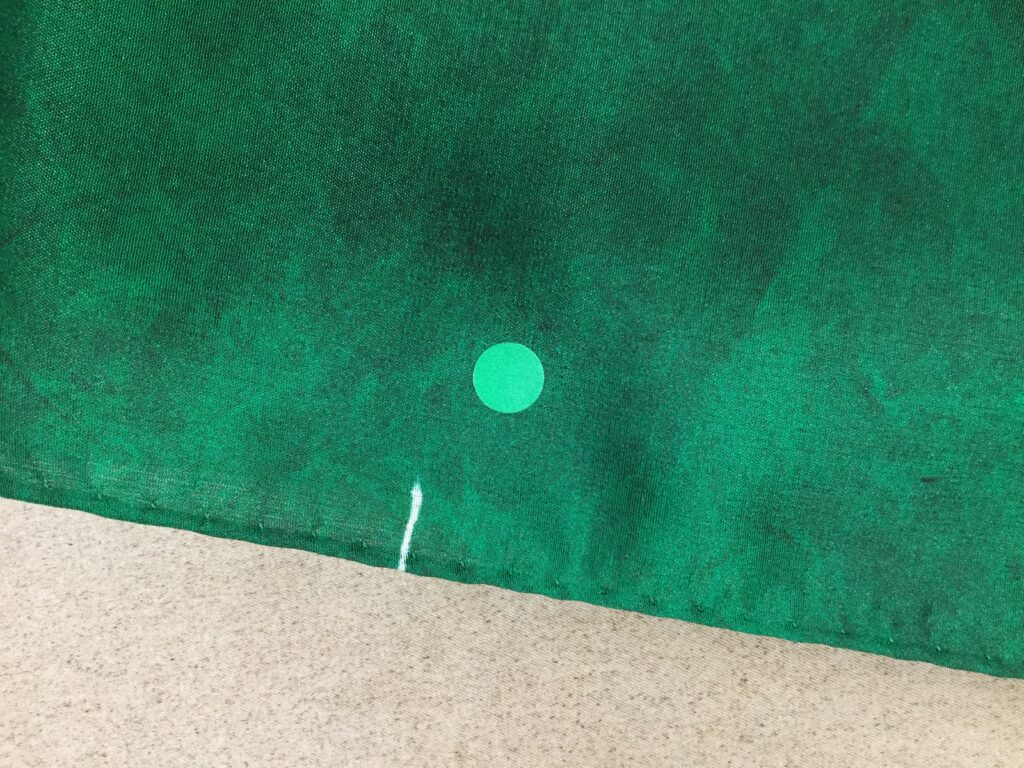
An area of block colour or even white will instantly draw your eye to any inclusions. Even the tiniest of ink drops will be noticeable.
It is best practice to design multi-coloured, multi-patterned images.

Please check your artwork carefully before submitting for printing.
Our CAD team will do their best to check for any obvious errors in artwork, however, we cannot be held responsible for any unwanted content that the designer may have left within the artwork in error.
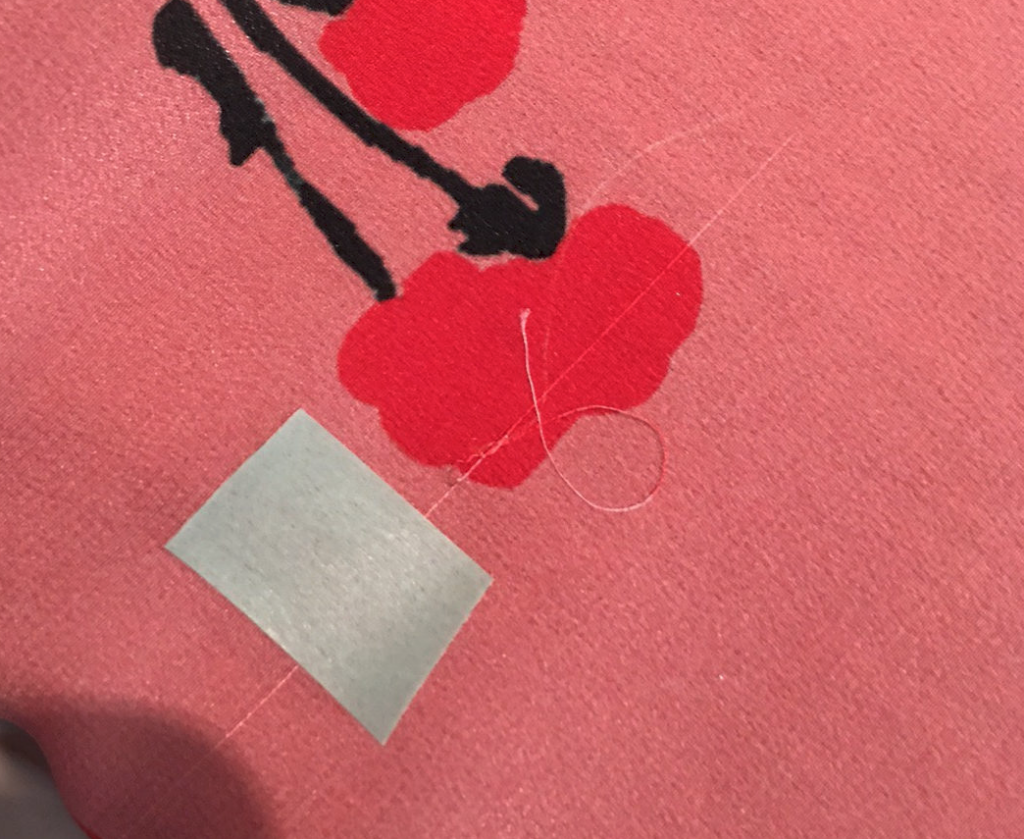
When a thread is moved after printing it will reveal the base colour of the fabric underneath it.

Block colour clearly shows damage that can occur during the fixing stage of the process as it passes through the steamer.